Para muchos aficionados al bricolaje, la emoción de desmontar y reparar teléfonos móviles va más allá de sustituir pantallas o componentes que funcionan mal, como altavoces y cámaras. Pero un aspecto de estas reparaciones que a menudo se pasa por alto es la restauración de las piezas pequeñas a su estado original. Asegurarse de que estos componentes se reinstalan correctamente es crucial para mantener la funcionalidad y longevidad del dispositivo. En esta guía, le guiaremos a través del proceso profesional de instalación de piezas pequeñas en la carcasa de la tapa frontal de un Samsung. Recuerde que todas las pruebas y la instalación deben realizarse en un entorno seco y sin polvo para evitar la contaminación.
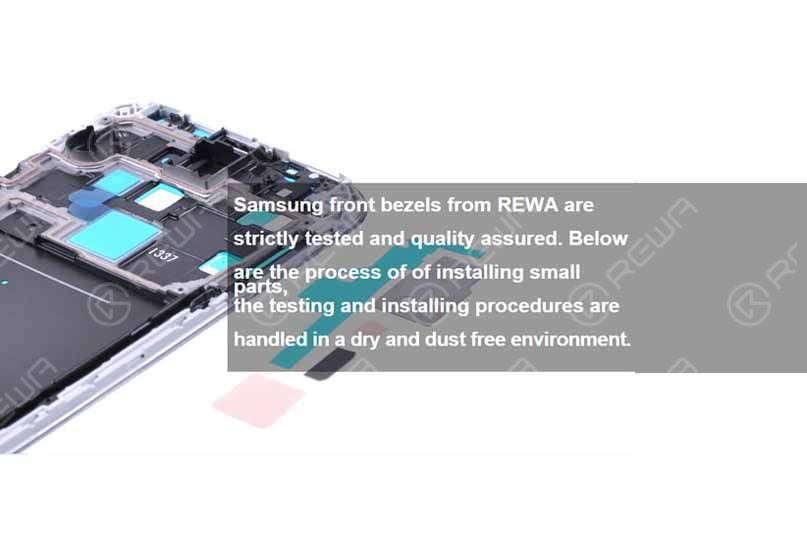
Herramientas necesarias
- Cubrededos de goma antiestática
- Pinzas antiestáticas con punta de plástico (PS)-ESD259A
Piezas pequeñas incluidas
- Enchufe de la luz de señalización
- Esponja pequeña
- Disipador de calor pequeño
- Gran disipador de calor
- Película disipadora de calor
- Adhesivo para puerto de carga
- Placa de cámara
- Emisión térmica Paster
- Altavoz de oreja de malla
- Adhesivo bisel frontal
Todas estas y más piezas de reparación están disponibles en nuestro sitio web Tienda REWA
Procedimientos operativos
1: Instalar el conector de la luz de señalización
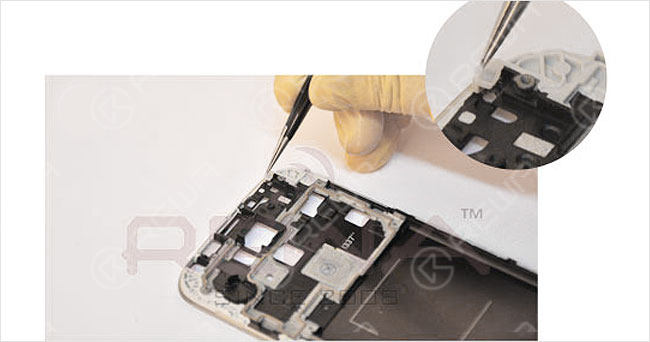
Coloque el conector de la luz de señal en la esquina superior derecha del marco frontal del teléfono móvil, en la parte posterior de la pantalla LCD.
2: Añadir la esponja pequeña
Rellene la esquina superior derecha de la placa frontal con la esponja pequeña, asegurándose de que quede bien ajustada.
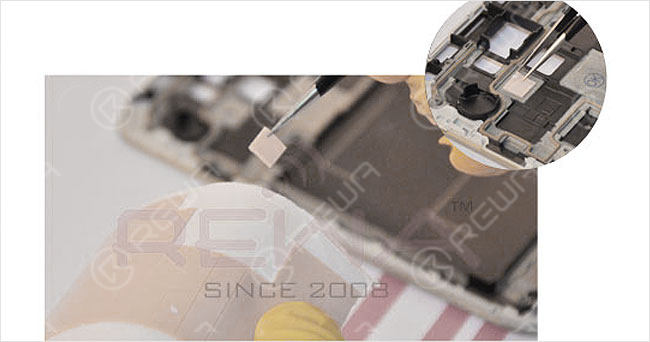
3: Instale el disipador de calor pequeño
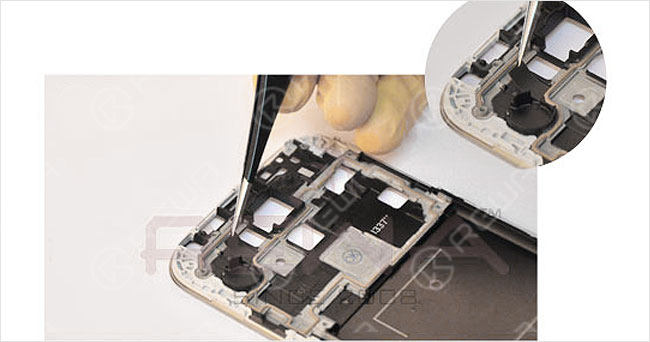
Coloque el disipador de calor pequeño en su ubicación designada. El disipador de calor es esencial para conducir e irradiar el calor de los componentes eléctricos.
4: Instalar el disipador de calor grande
Del mismo modo, instale el disipador de calor grande en el lugar correspondiente, asegurándose de que quede perfectamente alineado.
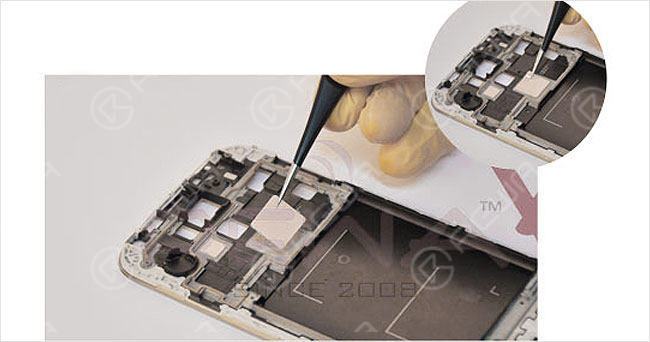
5: Laminado del disipador de calor
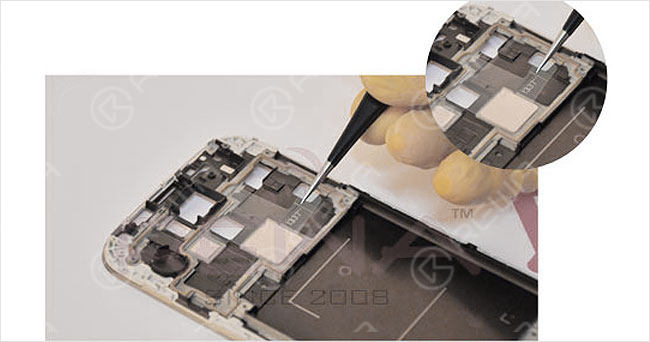
Coloque la lámina disipadora de calor directamente encima del disipador de calor grande, asegurándose de que cubre toda la zona.
6: Aplicar el adhesivo del puerto de carga
Antes de aplicar el adhesivo, limpia bien la superficie para eliminar cualquier resto de polvo, suciedad o grasa. Utilice un paño sin pelusas con alcohol o un limpiador sin silicona. A continuación, retire la lámina protectora y aplique la cinta adhesiva del puerto de carga sobre la posición correspondiente de la cubierta frontal. Presione firmemente durante al menos 5 segundos para garantizar una unión segura.
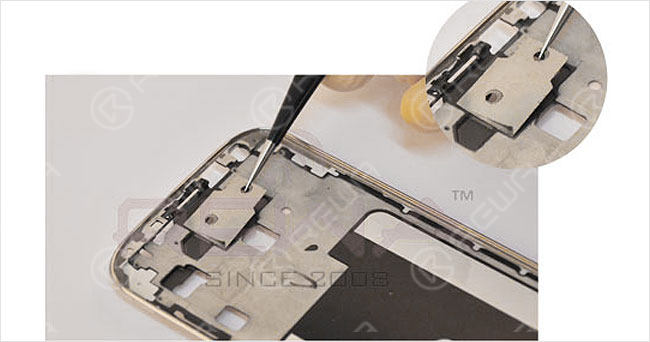
Nota: Durante los pasos 1 a 6, el lado en el que se montan las piezas pequeñas debe ser opuesto al lado de montaje de la pantalla.
7: Instale la placa de la cámara
Utilizando unas pinzas antiestáticas con punta de plástico, coloque la placa de la cámara en el lugar correcto.
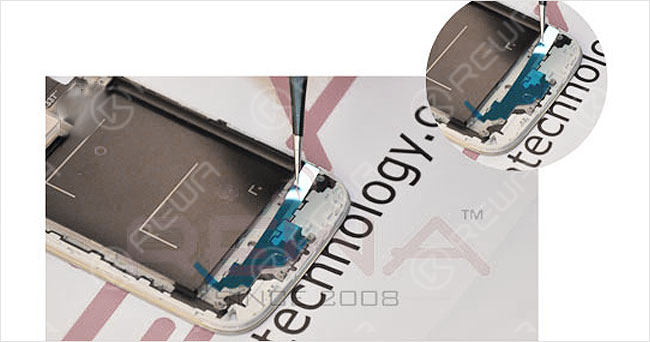
8: Aplique el revoque de emisión térmica:
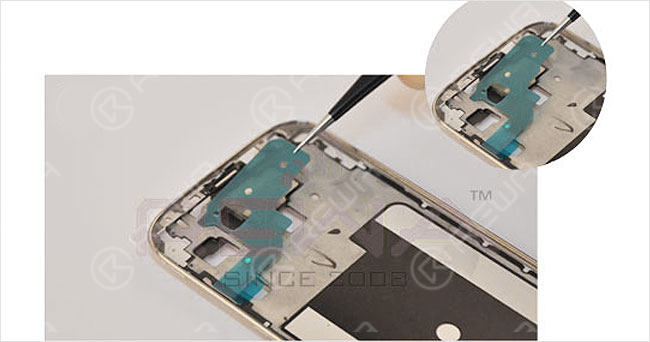
Al igual que en los pasos anteriores, instale la rejilla de emisión térmica en la carcasa delantera para gestionar eficazmente la distribución del calor.
9: Instale la malla del altavoz auricular
Introduce con cuidado la malla del altavoz en el pequeño espacio con unas pinzas de punta de plástico para asegurarte de que se mantiene en su sitio.
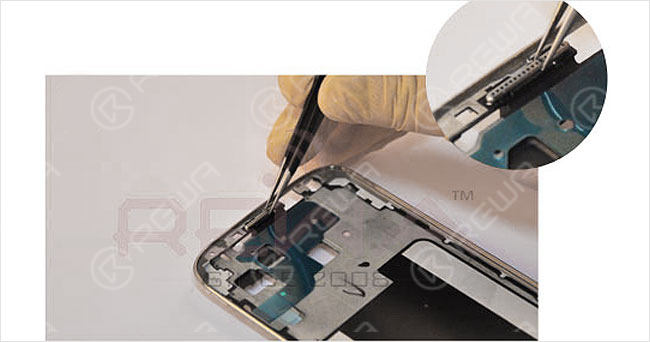
10: Aplique la cinta adhesiva del embellecedor frontal
Para una mejor adherencia entre el LCD y el conjunto de la pantalla táctil digitalizadora, aplique la cinta adhesiva del bisel frontal al marco de soporte del LCD.
Recordatorio: Las piezas pequeñas de los pasos 7-10 se instalan en la parte frontal, donde se monta la pantalla.
Resultado final
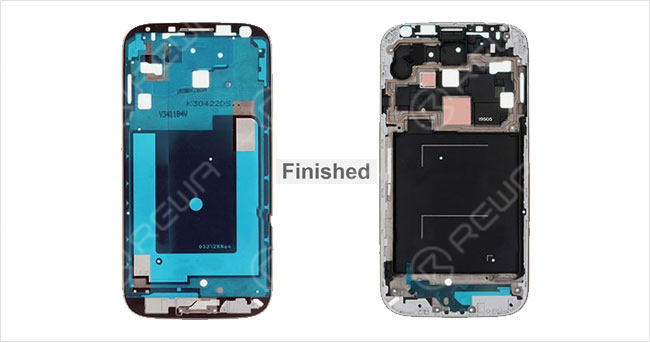
El bisel frontal Samsung terminado con todas las piezas pequeñas instaladas funcionará como nuevo, con todos los componentes bien colocados.
Conclusión:
Instalar con éxito piezas pequeñas en una carcasa de cubierta frontal Samsung requiere precisión y atención a los detalles. Si sigues estos pasos, te asegurarás de que todos los componentes se coloquen correctamente, lo que dará lugar a una reparación de calidad profesional que devolverá a tu dispositivo su estado original. Tanto si eres un técnico experimentado como un aficionado al bricolaje, dominar estas técnicas te ayudará a conseguir los mejores resultados en las reparaciones de tu teléfono.


