For iPhone 7-8P, 80% of Touch ID issues are caused by broken home button cable and we can fix the problem by jumping wires on the two layers of wires on the home button cable respectively. Which is very difficult especially when the bottom layer comes with many wires. And that’s when we bring you this new solution in our iPhone 7 Plus Touch ID repair blog today. With the help of the iPhone 7-8P Home Button Repair Socket Cable, we can fix the Touch ID problem in a safe and efficient way.
Tips: the home button cable is fragile and therefore professional operation is needed. For those who have no repair skills, please look before you leap.
Malfunzionamento
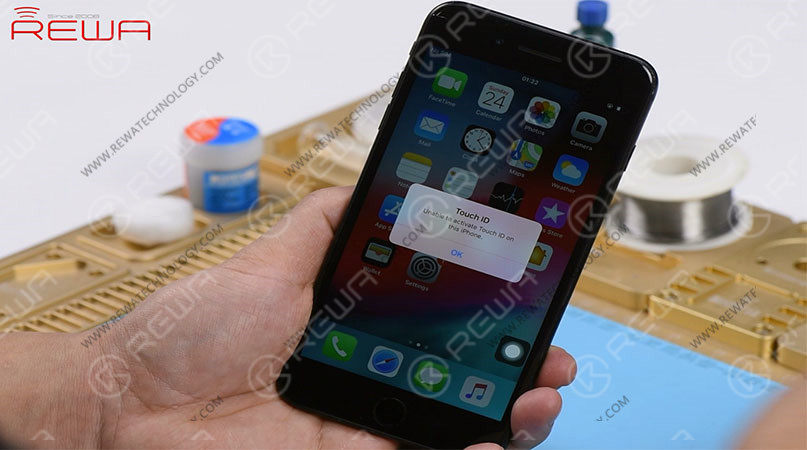
Press the power button to turn on the phone. The phone turns on normally. However, there is an alert saying “Unable to activate Touch ID on this iPhone. Try to press the home button. The home button is also unresponsive.
Go to Settings > Touch ID & Passcode. The option ‘Add a Fingerprint’ is grayed out. Judging by this, home button relevant circuit or home button cable has malfunctioned.
Diagnosing
Take apart the phone and remove the display assembly. Run diode mode measurement of the home button connector. The measured value is normal. Which indicates that home button relevant circuit is also normal. And the home button issue has nothing to do with the logic board.
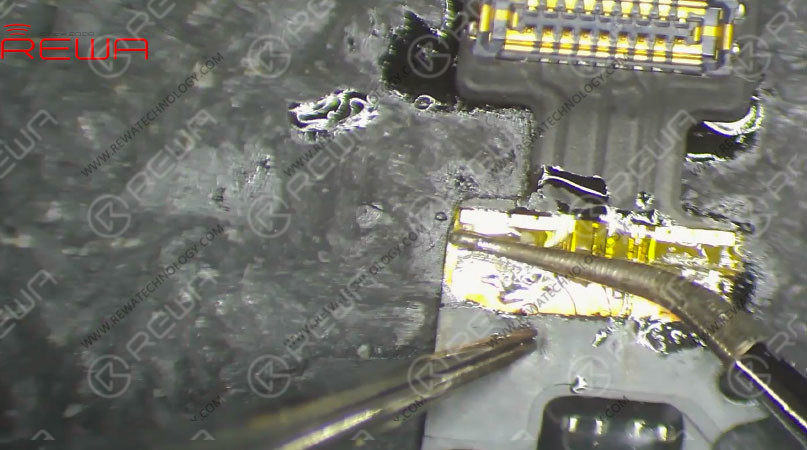
Next, we need to check the home button cable. Disconnect the home button cable. We can see that the home button cable nearby the socket is broken.
Risoluzione dei problemi
Judging by this, when installing/detaching the home button cable, rough operation of the technician led to the broken cable and resulted in the Touch ID not working problem. And for iPhone 7/7P/8/8P, 80% of Touch ID issues are caused by broken home button cable. We can fix the broken cable by jumping wires.
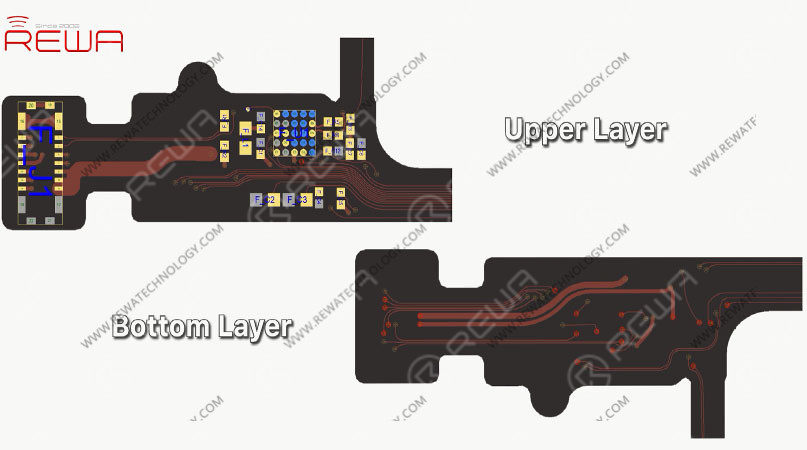
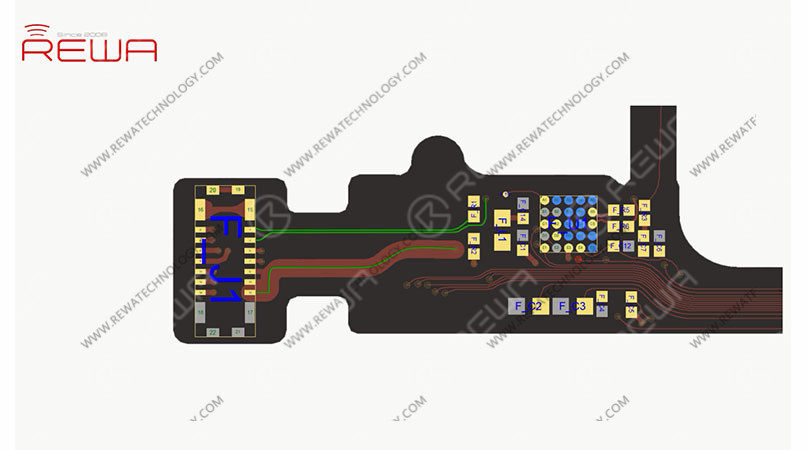
Also, there are two layers of wires on the home button cable. The bottom layer comes with more wires than the upper layer. When repairing the broken cable, the traditional way is to jump wires on the two layers respectively. Which is difficult and the home button cable might also be damaged. And that’s when we bring you this safe and efficient solution today. We can repair the broken cable by soldering the bottom layer of wires to the iPhone 7-8P Home Button Repair Socket Cable and joining up the upper layer of wires by jumping wires.
Please be noted that the home button cable can be easily damaged, here we also need a specialized Sculpture Knife to complete the work
Broken Home Button Cable Repair
Passo 1
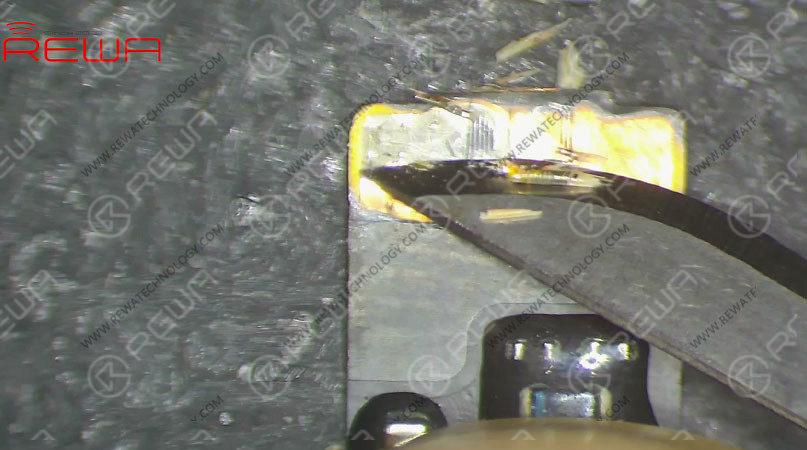
Secure the home button cable with the double-sided tape. Cut off the broken cable along with the socket. Then slice open the insulating coating on the cable.
Passo 2
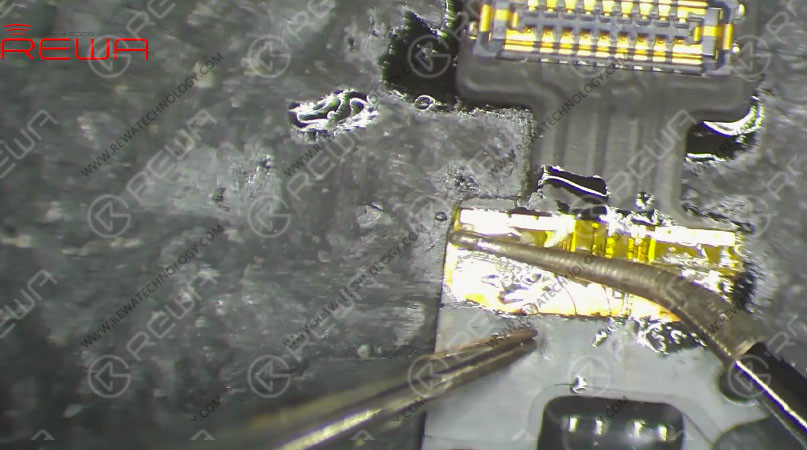
Heat with the Helical Wind Hot Air Gun for 5 seconds. Scrape off the insulating coating and then wires on the upper layer with Sculpture Knife. Clean with PCB Cleaner soaked cotton ball afterwards.
Passo 3
Cut off the needless part of the Home Button Repair Socket Cable. Apply some solder paste and paste flux to the bottom layer. Apply the home button repair socket cable to the right position. Solder carefully with the Soldering Iron. Once done, clean with PCB Cleaner soaked cotton ball.
Passo 4
Now we need to solidify the soldered area. Apply some UV Curable Solder Mask to the soldered area. Then solidify the cable under UV Dryer Lamp for 5 minutes.
Passo 5
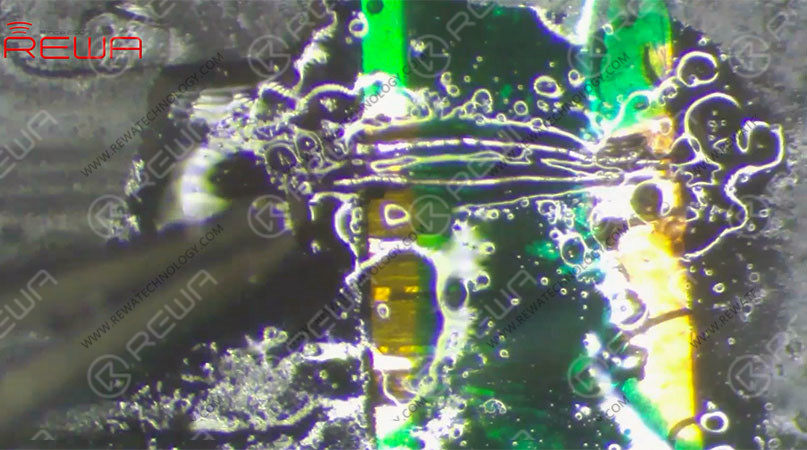
Next, let’s join up the upper layer of wires by jumping wires. Apply some paste flux and solder paste first. Here we need 0.02mm solder tinned enamelled wire. Solder the wire to the corresponding position on the upper layer one by one. Once done, apply some UV Curable Solder Mask. Then solidify the cable under UV Dryer Lamp for 5 minutes.
Test
Now we can assemble the phone and test. Get the home button cable installed. Get the display assembly installed and battery connected. Press the power button to turn on the phone. The phone turns on normally.
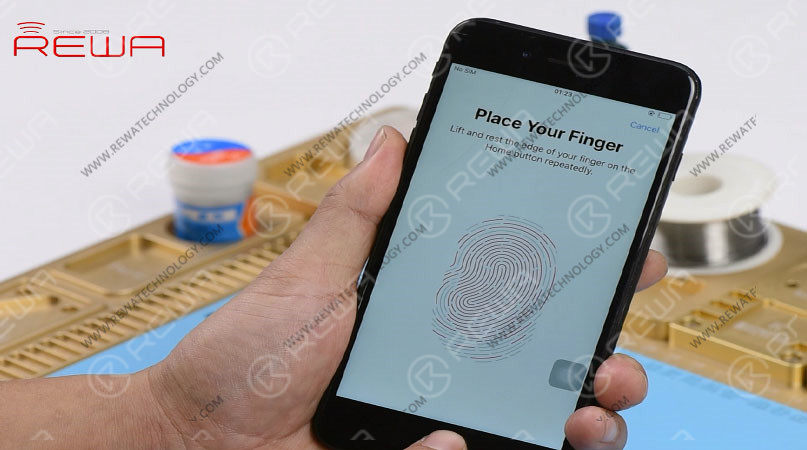
Go to Settings > Touch ID & Passcode. The option ‘Add a Fingerprint’ is back to normal. Try to set up Touch ID on the phone. With Touch ID set up successfully on the phone, Touch ID function is also normal. The home button is also back to normal Warm tips: get the phone full assembled after confirmation of fault clearance.
Potete anche visitare Canale Youtube REWA to check our video of iPhone 7 Plus Touch ID Not Working – Broken Home Button Cable Repair.
