Noi di REWA Technology siamo consapevoli che le bolle d'aria sono uno dei problemi più comuni e frustranti nella rimessa a nuovo dello schermo dell'iPhone. Queste piccole imperfezioni possono compromettere l'intero processo, con conseguenti risultati negativi e perdite di tempo. Per garantire uno schermo impeccabile e perfettamente laminato, abbiamo delineato cinque suggerimenti chiave derivati dai nostri esperti flussi di lavoro di riparazione presso il REWA Lab.

Che siate tecnici, proprietari di un negozio o alle prime armi con la ricondizionatura degli iPhone, questa guida passo passo vi aiuterà a migliorare la vostra percentuale di successo e a ridurre al minimo i costosi errori. Esploriamo le migliori pratiche per eliminare le bolle d'aria e ottenere una finitura liscia e professionale.
Fase 1: Preparare gli strumenti e l'area di lavoro
Prima di iniziare il processo di ricondizionamento, assicuratevi di avere gli strumenti necessari per la precisione e la pulizia. Gli strumenti che consigliamo sono:
- Macchina laser UV - per la rimozione dell'adesivo del telaio
- Tronchesino - per la rimozione della cornice
- Filo da taglio da 0,028 mm - per la separazione del vetro anteriore
- Rimuovi colla elettrico - per la pulizia dell'adesivo residuo
- Nafta e spugna - per rimuovere i residui di colla
- Panno privo di lanugine - per la pulizia della superficie OLED
- Lampada di ispezione della polvere - per individuare i detriti sugli OLED
- Stampo di allineamento - per un posizionamento preciso di OLED e vetro frontale
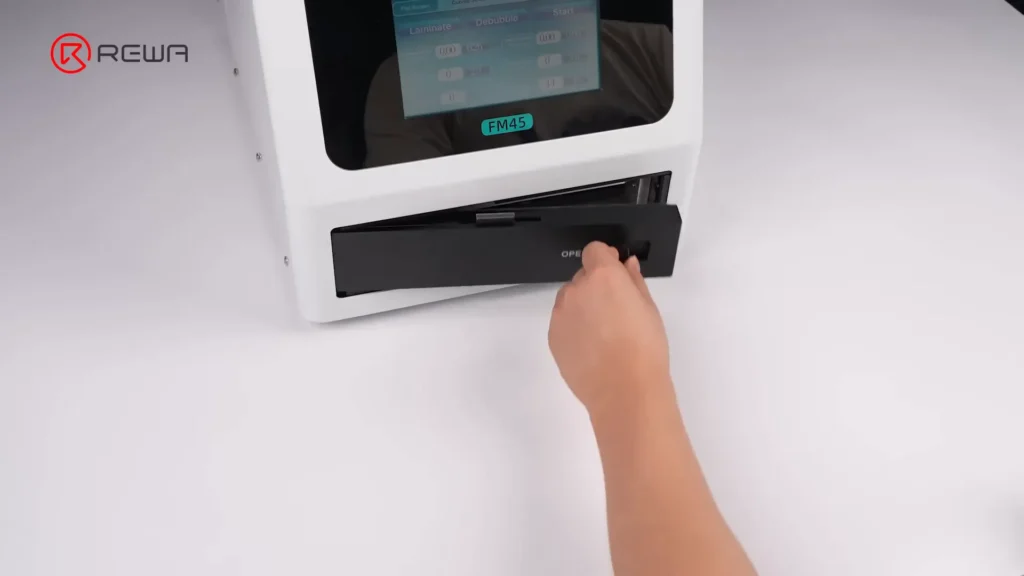
- REFOX FM45 Macchina per laminare e sbavare - per l'incollaggio finale
- RIPARTIZIONE del vetro anteriore con OCA - vetro superiore di ricambio

Uno spazio di lavoro pulito e organizzato è essenziale. Lavorare sempre su un tavolo pulito per ridurre al minimo la polvere e i contaminanti che potrebbero causare bolle.
Fase 2: rimuovere con cautela la cornice del telaio
Per ridurre il rischio di bolle d'aria durante la rimessa a nuovo, si consiglia di rimuovere il Cornice dello schermo dell'iPhone. Procedere come segue:
- Applicare l'alcol isopropilico lungo i bordi della cornice.
- Utilizzare le pinze da taglio per staccare con cautela la cornice della lunetta.


La rimozione della cornice crea una superficie più pulita e riduce al minimo l'aria intrappolata durante la laminazione.
Fase 3: Separare il vetro anteriore e pulire l'adesivo residuo
Separare il vetro anteriore con un Filo da taglio da 0,028 mmavendo cura di lavorare con pazienza e precisione per evitare di danneggiare i componenti.

Dopo aver separato il vetro, utilizzare un rimuovi colla elettrico per eliminare i residui di colla dallo schermo OLED. Questo passaggio è fondamentale per evitare le bolle causate dai residui di colla.

Infine, pulire la superficie con un panno privo di lanugine per assicurarsi che non rimangano particelle.
Fase 4: allineare lo schermo OLED al vetro anteriore
Questo è il passaggio più critico per evitare la formazione di bolle e garantire una finitura impeccabile. Seguire questi passaggi:
- Posizionare lo schermo OLED direttamente nello stampo di allineamento.
- Rimuovere la pellicola protettiva dal vetro anteriore utilizzando una linguetta a strappo.
- Posizionare con cura il vetro anteriore parallelo e allineato sullo schermo OLED nello stampo.
- Premere delicatamente sui quattro angoli per assicurarsi che l'OLED sia piatto e che tutti gli angoli siano in piano.
- Picchiettare delicatamente il centro del vetro per avviare l'adesione tra l'adesivo ottico trasparente (OCA) e l'OLED.


Durante questo processo, assicurarsi che il cavo OLED flessibile sia leggermente piegato verso l'alto per evitare interferenze durante l'allineamento.
Fase 5: Laminazione e rimozione delle bolle d'aria
Dopo l'allineamento, capovolgere con cautela lo stampo e posizionare lo schermo nel macchina per laminare e sbavare. Questa macchina utilizza la pressione e il vuoto per incollare perfettamente gli strati del vaglio, eliminando tutte le bolle d'aria intrappolate.

Una volta completato il processo di laminazione, rimuovere lo schermo dalla macchina e togliere la pellicola protettiva. Il risultato dovrebbe essere uno schermo chiaro e privo di bolle.
Risoluzione degli errori più comuni
Se dopo la ristrutturazione compaiono delle bolle, di solito indica che uno o più passaggi non sono stati eseguiti con cura. Gli errori più comuni includono:
- Non pulire accuratamente i residui di colla o le particelle di polvere dalla superficie dell'OLED.
- Lavorare in un ambiente polveroso o su un tavolo sporco.
- Il disallineamento del vetro anteriore e dello schermo OLED provoca un'adesione non uniforme.
- Consentire lo spostamento del vetro anteriore durante il posizionamento.

Seguendo attentamente le procedure consigliate, questi problemi si ridurranno in modo significativo.
Domande frequenti
Perché si formano bolle d'aria durante la ristrutturazione dello schermo dell'iPhone?
Le bolle d'aria si formano quando la polvere, i residui di colla o un allineamento non corretto intrappolano l'aria tra l'OLED e il vetro anteriore durante la laminazione. Una pulizia inadeguata e una manipolazione poco attenta sono cause comuni.
Posso riparare le bolle dopo la laminazione?
Una volta laminato, è difficile rimuovere le bolle senza danneggiare lo schermo. La prevenzione è fondamentale: assicurarsi che la pulizia e l'allineamento siano corretti prima della laminazione.
Quali strumenti sono essenziali per evitare le bolle?
Gli strumenti essenziali includono una macchina laser UV, un filo da taglio di precisione, un rimuovi colla elettrico, uno stampo di allineamento e una macchina per laminare e sbavare. Inoltre, è fondamentale lavorare su una superficie pulita e priva di polvere.
Quanto è importante l'ambiente di lavoro?
Uno spazio di lavoro pulito e privo di polvere è fondamentale per ridurre al minimo il rischio che le particelle di polvere causino bolle durante la laminazione.
Conclusione:
Per ottenere un risultato impeccabile di ricondizionamento dello schermo dell'iPhone senza bolle d'aria è sufficiente seguire questi cinque passaggi essenziali. Dalla preparazione degli strumenti e dell'area di lavoro all'allineamento e alla laminazione precisi, ogni fase è fondamentale per la qualità finale.
Ci auguriamo che questi consigli di REWA Technology vi aiutino a ridurre al minimo i problemi di bolle d'aria e a migliorare la vostra percentuale di successo nel ricondizionamento. Se avete riscontrato bolle d'aria durante il ricondizionamento o avete domande, non esitate a condividere le vostre esperienze o a chiedere nei commenti qui sotto.
Spiegazione dei termini chiave:
- OLED (diodo organico a emissione di luce): Lo strato di display effettivo sotto il vetro dell'iPhone. Deve essere maneggiato con cura.
- OCA (Optically Clear Adhesive): Uno strato adesivo trasparente utilizzato per incollare il vetro anteriore all'OLED.
- Stampo di allineamento: Un vassoio preciso progettato per mantenere l'OLED e il vetro anteriore in perfetto allineamento per la laminazione.
- Macchina di laminazione: Una macchina che utilizza la pressione e il vuoto per incollare l'OCA, il vetro e l'OLED e rimuovere le bolle d'aria intrappolate.


