The iPhone 13 Pro introduces several hardware changes, particularly in its Face ID module, which sets it apart from its predecessor, the iPhone 12 Pro. One significant difference is the integration of the flood illuminator with the dot projector, resulting in a smaller TrueDepth camera module and a different component layout. This design change, while improving the device’s aesthetics and functionality, presents new challenges for repair technicians. In this guide, we’ll walk through the process of repairing the Face ID module on the iPhone 13 Pro when it becomes unavailable, highlighting the tools and techniques needed for this intricate repair.
Introduction of the iPhone 13 Pro Face ID Module
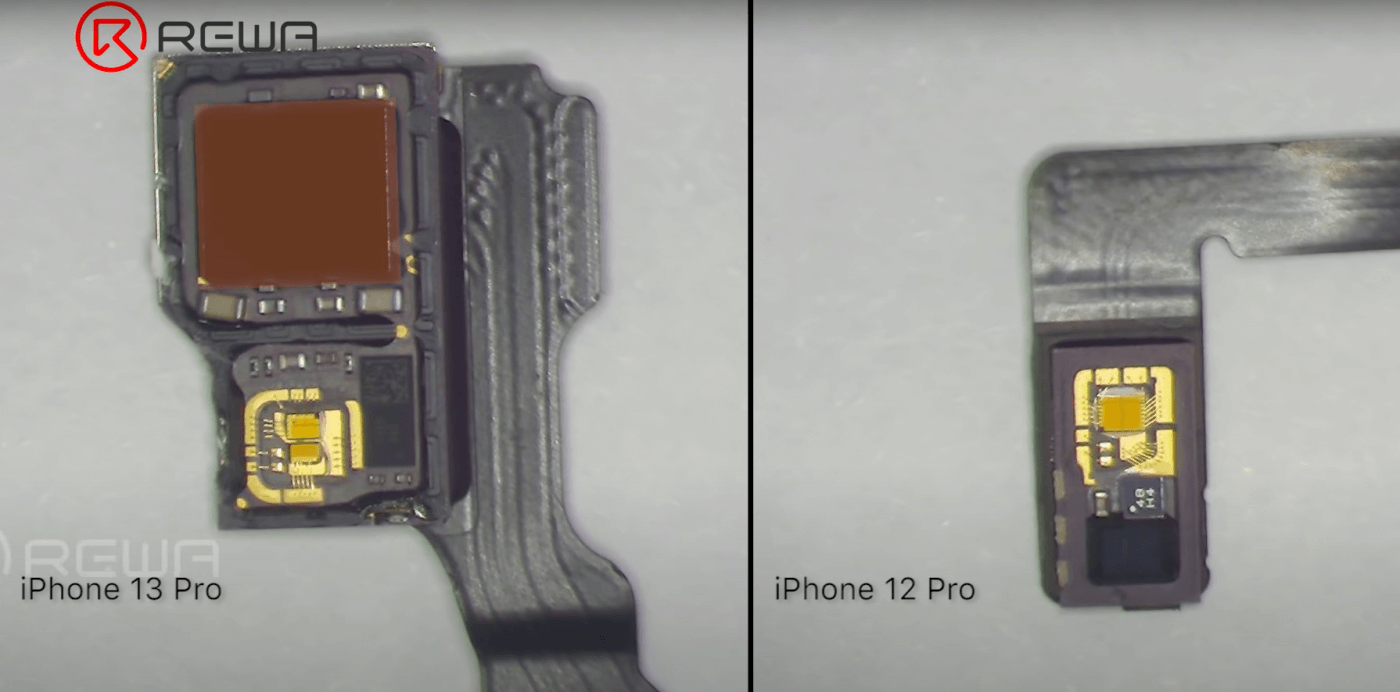
The iPhone 13 Pro differs from the iPhone 12 Pro in several key ways, particularly in the Face ID system. Notably, the iPhone 13 Pro no longer has a separate flood illuminator on the earpiece module; it has been integrated with the dot projector. This integration allows for a smaller TrueDepth camera module, with the dot projector now centrally located. These changes make the Face ID system more compact but also more challenging to repair.


Repair Tools Required for the Face ID Issue
- Face ID Lattice Repair Hold Fixture
- Screwdriver, tweezers, pry blade
- Face ID programmer and computer

Face ID Issue Repair Process
Initial Diagnosis:
- When your iPhone 13 Pro displays the message “Face ID is not available, try setting up Face ID later,” it’s a sign that the Face ID module might be malfunctioning.
- Begin by shutting down the phone and removing the bottom screws to carefully take apart the phone.


Disassemble the Phone:
- Disconnect the screen flex cable to remove the display.
- To prevent damage, apply protective stickers on the front camera module before proceeding with the repair.
- Next, remove the front camera, infrared camera, and dot projector module.
Data Backup:
- Connect the Face ID module to the programmer and the camera to the computer.
- Open the specified Face ID software and click the “Pearl Unbind” button to back up the necessary data.
Then disconnect the screen flex cable to remove the display.
To avoid the potential damage, we should also apply some stickers on the front camera module before repairing.

Next, take out the front camera, infrared camera and dot projector module out.

In the first place, let’s connect the Face ID module with the programmer, and the camera to connect with the computer.

Then open the specified Face ID software and click the “Pearl Unbind” button to back up the data.

After unbinding, attach the Face ID module to the holder and carefully remove the metal plate with the grinding pen.

Pry up the shielding cover with a sculpture knife

Then remove the dot projector with the hot air gun at 120℃, during heating pry with a blade to separate. Below is how the dot projector inner board looks like

Compare with iPhone 12 Pro, obviously, the dot projector of the iPhone 13 Pro with flood illuminator integrated.
Then let’s remove the chip with the hot air gun at 330℃ carefully

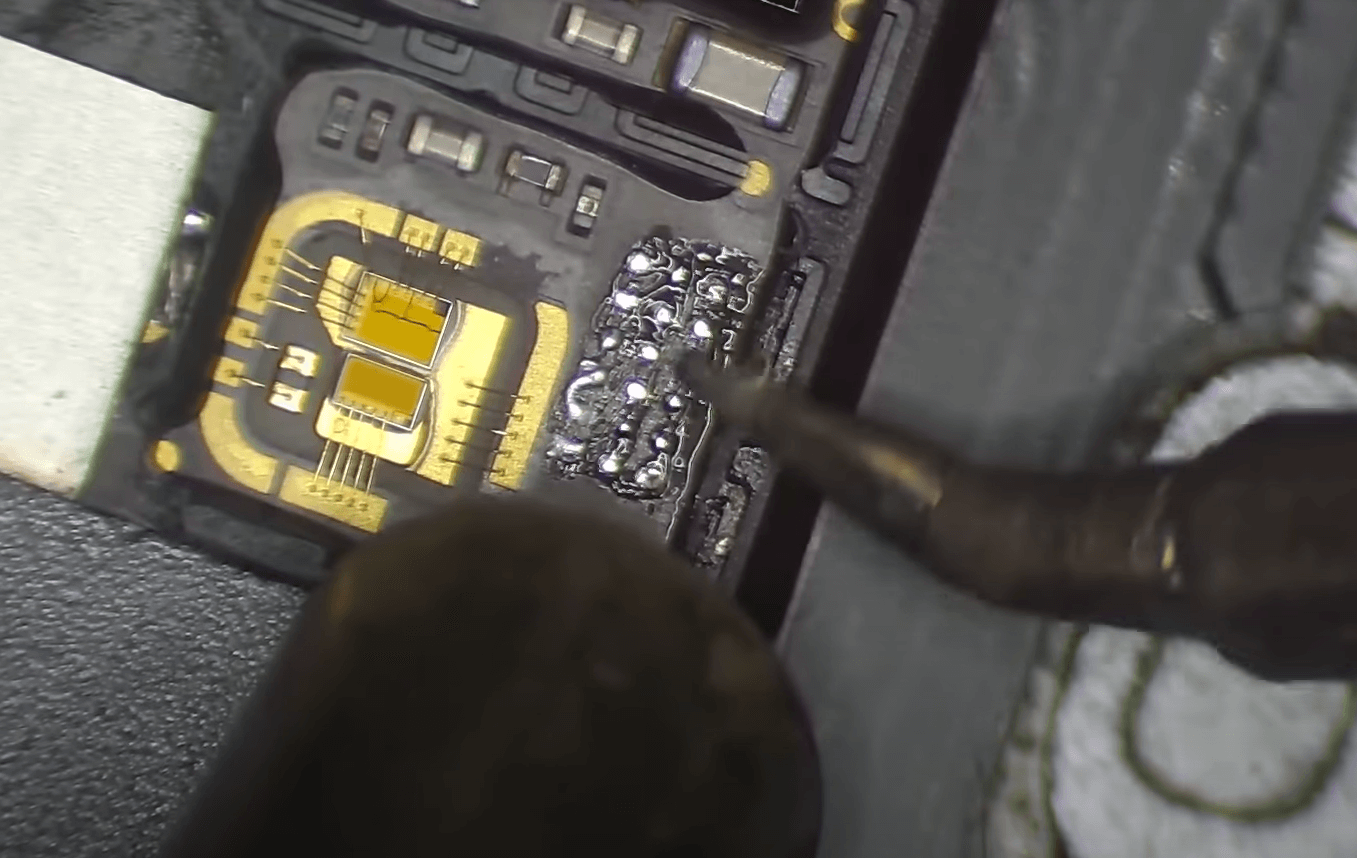
Then clean the bonding pads on the tiny PCB board with the hot air gun + soldering iron at 360℃.

Keep cleaning the bonding pads with solder wick till the pads are clean and flat
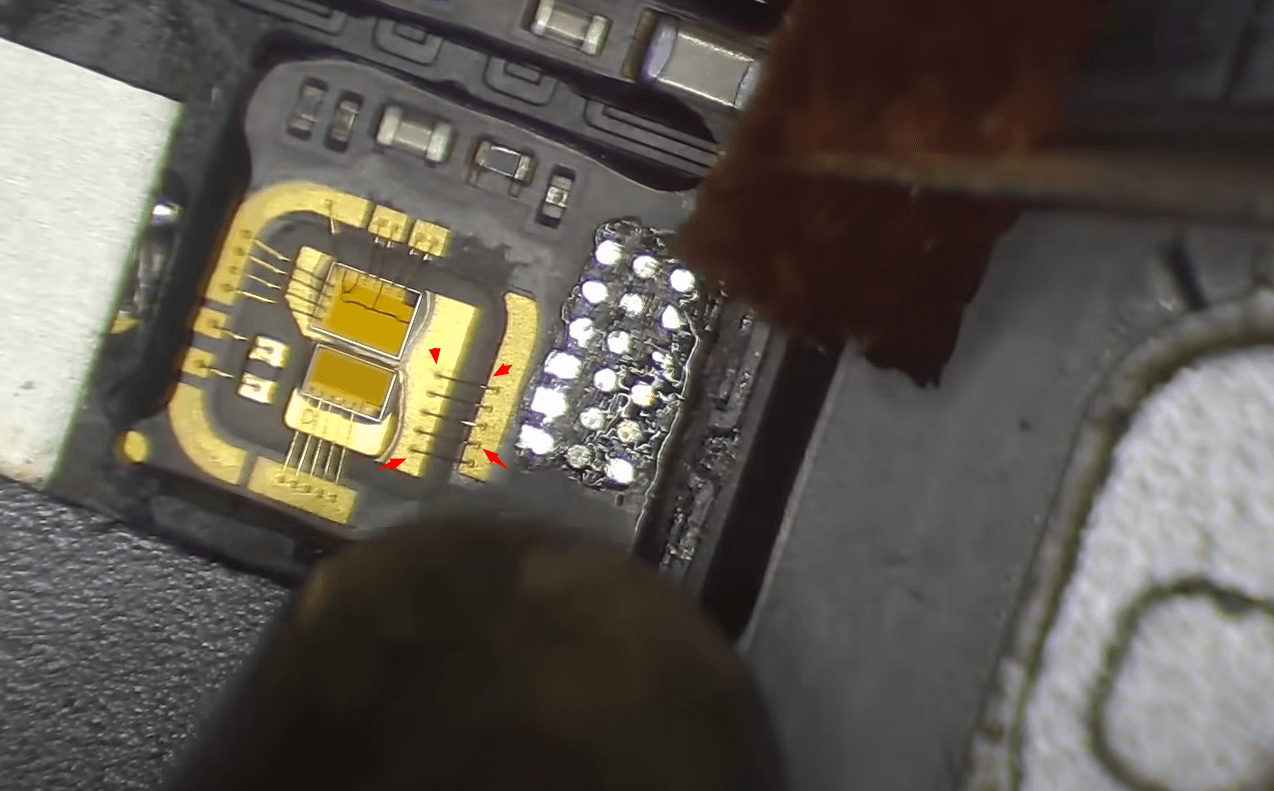
Pay attention to not damaging the golden wire during operation

Clean the pads again with the PCB cleaner

Apply some solder paste to the bonding pads

Align and solder a tiny transfer PCB board with the hot air gun at 330℃. (the new chip pads quantity is smaller, so we need to solder a PCB transfer board first)

Then flatten the bonding pads on the little board with solder wick first, then align and put the new IC in position.
Heat with the hot air gun to solder it on the surface of the little PCB, the heating temperature is also around 330℃.

After that, connect the cable with the pearl programmer to write the data by pressing the “Pearl bind” button on the software.


Next, we install the flex cable on the phone for testing

The flood illuminator working fine

Ok, the test is OK. Then let’s assemble the front camera module

After alignment apply some specialized adhesive glue

Once the adhesive is set, install the front camera module, and connect the screen and battery to test.
Final Test:
Turn on the iPhone, and set up Face ID. If the setup is successful, the Face ID repair is complete, and the feature should work perfectly.

Tips
The integration of the flood illuminator with the dot projector in the iPhone 13 Pro not only reduces the notch size but also complicates Face ID repairs. Compared to previous methods involving flex cable replacement and module transfer, this new approach requires more precision and skill. The repair process is more demanding, emphasizing the importance of excellent handwork and attention to detail.


